Another insight I found out earlier this week is that things I take for granted and think everybody else should know how to easily do, actually isn't easy at all. For example, making something in Photoshop. This is where I need to step back and slowly think things through a little bit.
Bare with me while I remissness a little bit. Trust me there is a point to the little story below.
Here's a bit of my photo shopping history. I bought a scanner YEARs, I mean many years ago at this point. The scanner, if I had kept it, would probably fit well in the my towns local museum room of technology. The scanner came with a program disk that contained a photo manipulation program. I think it was photoshop 2.0 (elements or full adobe I don't remember)If not, it was similar. I played around with this for about a year making really bad anime fan art. I had no idea what the icons for each item was about. I just jumped in and dabbled around.
I get the fact, thinking about the past, that these programs until you learn the basics of them, can be a little overwhelming. I usually worry about how or what to write about.
Anyway....hard to learn, overwhelming sometimes, show you how I do this thing called digital stamps. Gotcha
First off, you're gonna need the following items or this little walk through isn't going to do you much good.
1. Scanner
2. Photoshop
Bonus! if you also have adobe illustrator or a lot more work is involved
3. pen
4. paper
and maybe
5. light box - this is only if you sketch out your image.
I usually sketch out ideas onto paper before making any kind of painting or project. I don't do anything to fancy, it's just regular typing paper.
Once I have my idea down, I tape my original sketch onto my light box and take some heavier card stock paper and trace the drawing onto the card stock with a sharpie maker. Why this step, because the clean up process in Photoshop is easier. I do not redraw the image in Photoshop with a pen. I don't own a tablet.
Make sure your scanner is on the black and white setting and at least 300 dpi. This does help out greatly when you bring the file into Photoshop.
(If you are already lost....well yeah...)
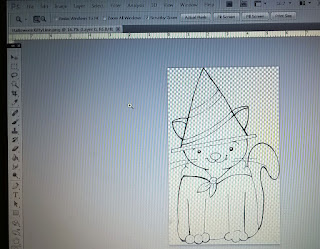
Open Photoshop. I drag my scanned image into the program.

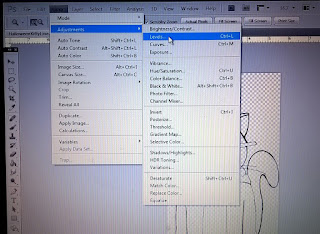
Next I will go to -----Image -----Adjustments ----- Levels You want to either use the black and white droppers or move the tabs. I'm not here to debate about which one works the best. I know there are some pretty strong opinions out there about dropper vrs. tabs. I think there are multiple ways to get this done. All are welcome here : )

Once this is a clean crisp black and white image, I go to the drop down menu SELECT----Color Range--- (the color range box pops up!)
Take your eyedropper and click on the black of the stamp.
Then click on "OK"
You should have the "dancing ants" as my graphic design teacher used to say in class. While the ants dance away, go to your toolbar and click on the "magic wand tool"
Right click and pick the option -----Layer Via Cut
Hurray! Your image or my image is now on a separate layer and you can drag your white background to the trashcan icon.
This is now a separate line art layer and you can save your file as a png. I usually zoom in and take my eraser to get all of the extra dust etc. I didn't get rid of with the adjustments step above.
Just FYI, a digital stamp doesn't have to be a .png file. This just makes the background transparent. Just taking the image into the program after scanning and doing the adjustments step above with a little zoomed in eraser clean up can make a really nice hand drawn digital stamp .jpg file.
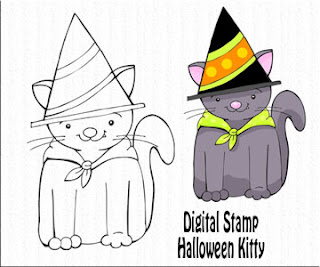
Here's my newest little addition to my etsy shop created exactly as you read above.
 Thanks for reading! Are you new to digital stamps? A Photoshop pro that has a better way to do this? Think I should add more pictures and a better explanation to this post? Please share and comment below. I love to learn new methods. This is just one of many ways to get your line art into a cleaned up stamp version. I will be updating my blog posts from time to time as I review them.

